Recent Posts

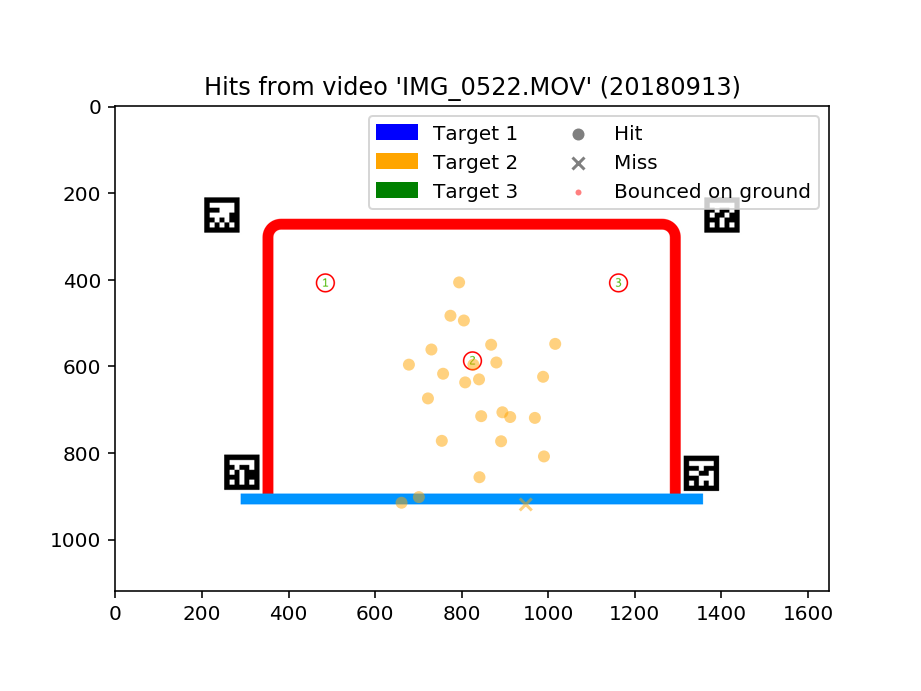
Manual positioned hits

3 minute read

After having analyzed 1625 shots in total (phew!), here is a compiled PDF of each round (missing the session from October 1, which I haven’t had time to analyze yet).

The long-term idea is to visualize this data in a more meaningful way for a player (like myself) trying to learn how to shoot. One thing that is painfully obvious after having manually positioned all these shots — becoming good takes a long, long time!

Interface for a tool I have built to help with the manual process. It is primarily keyboard controlled for efficiency and not all parts have a corresponding graphical representation. October 2018.

For each shot, I record the following information:

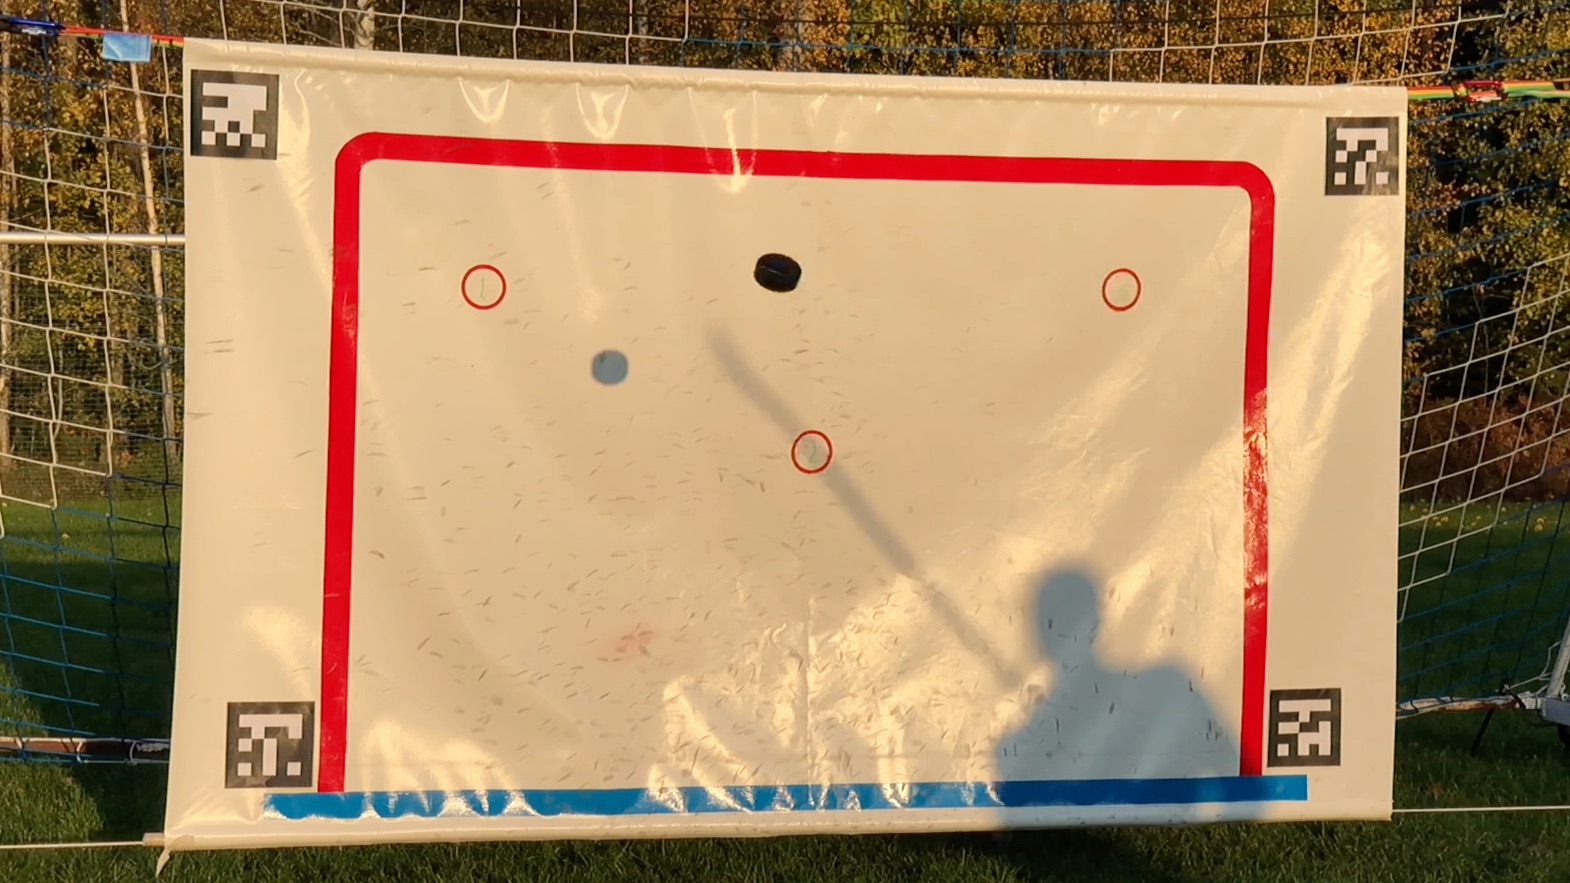
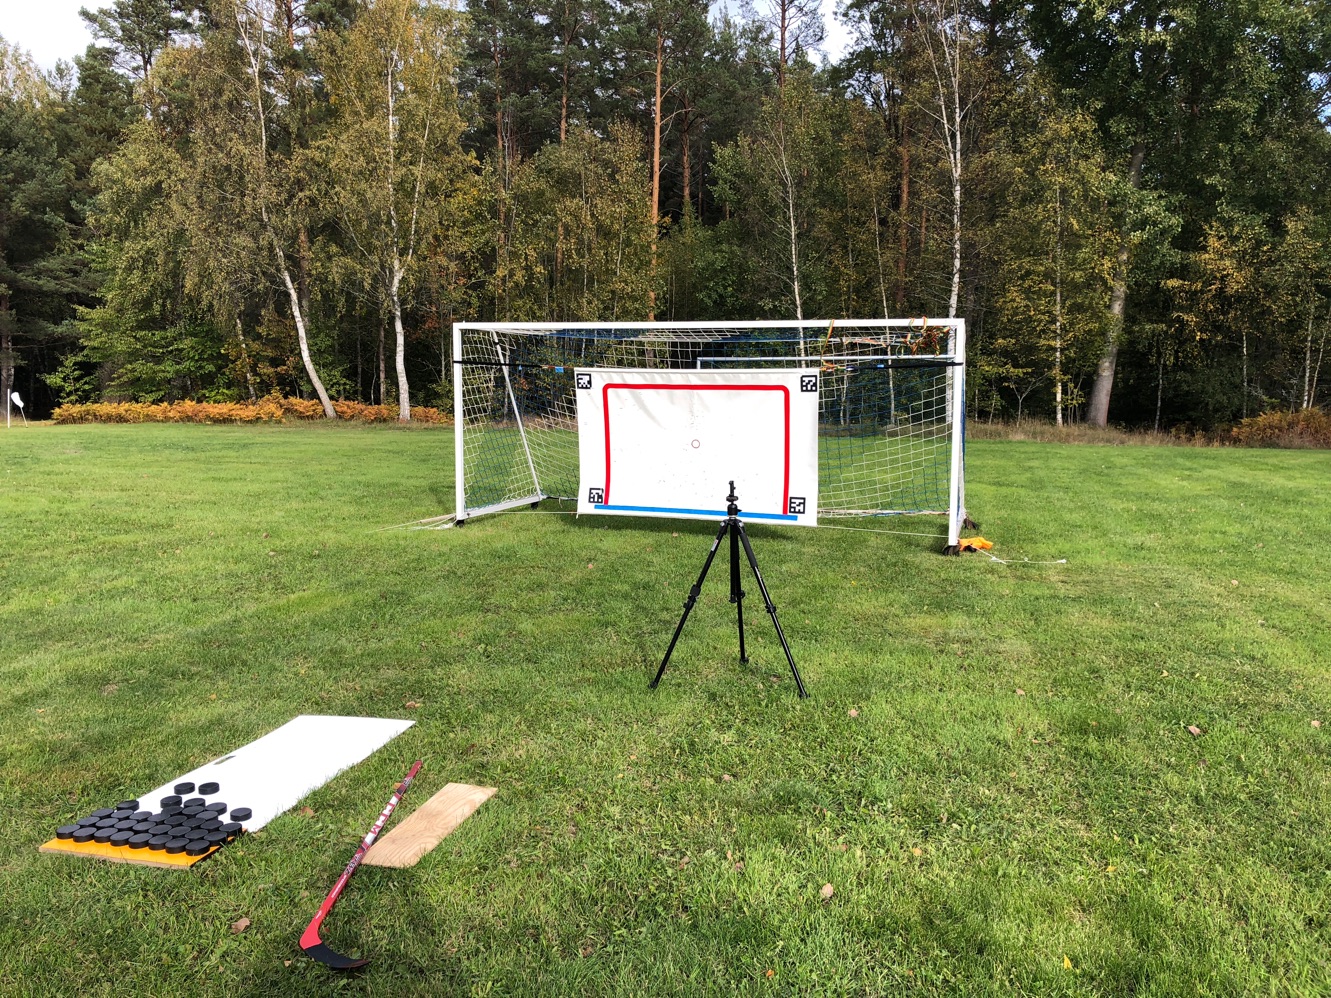
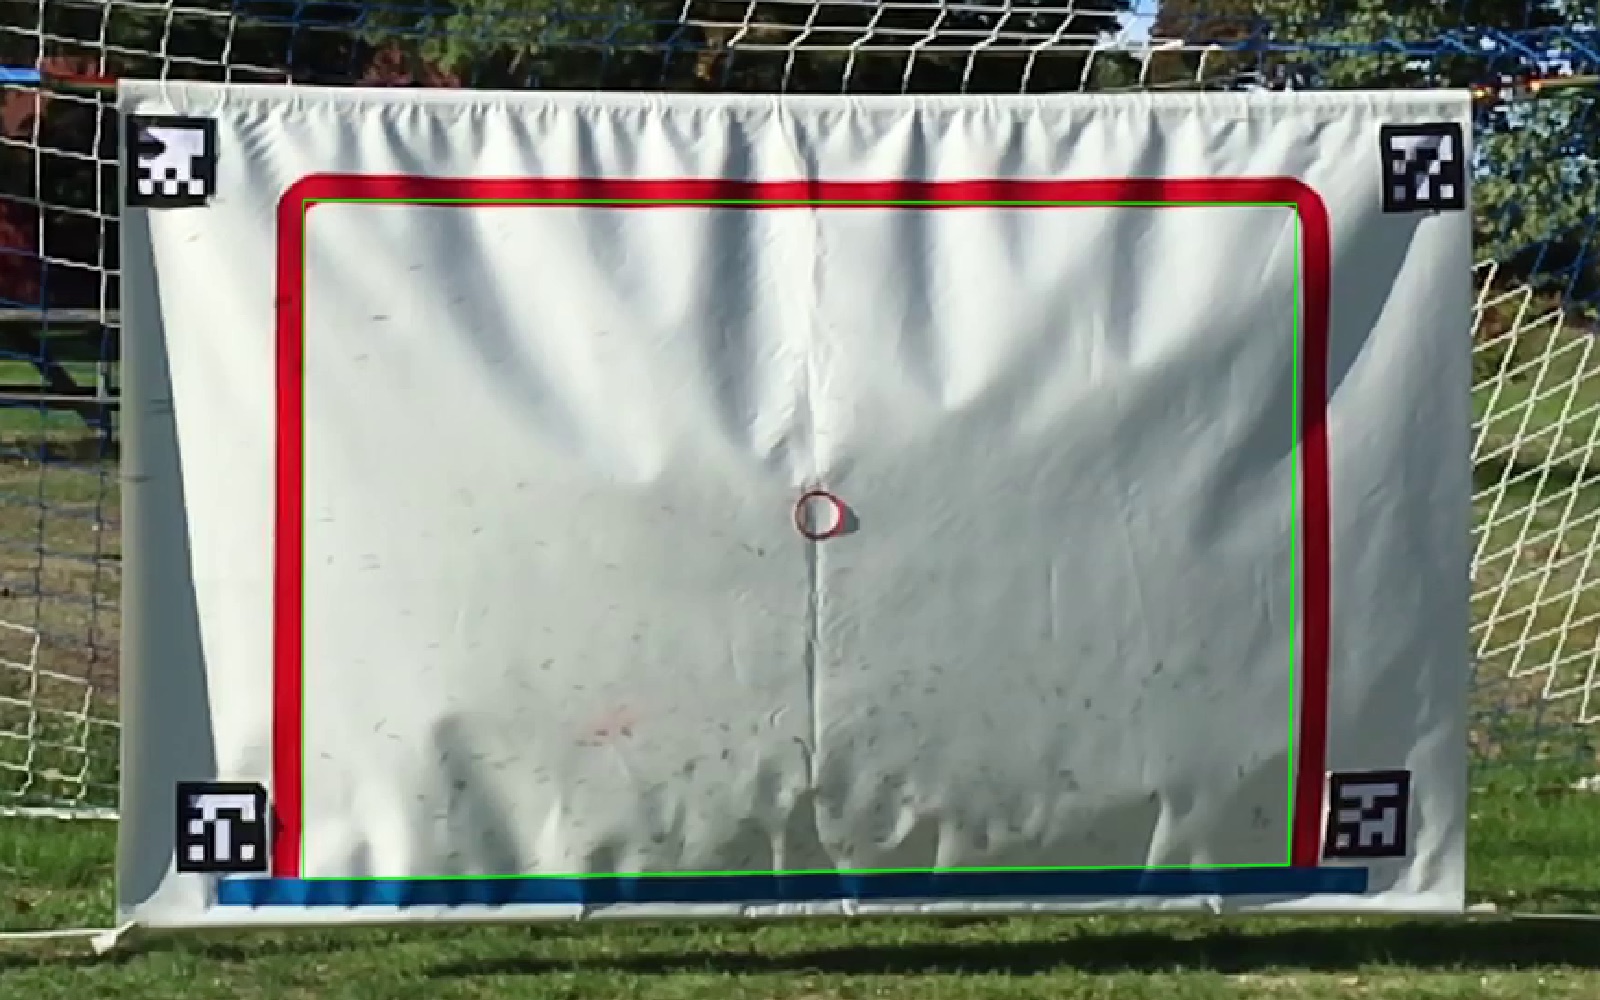
  1. The hit position. For shots outside the canvas, I approximate when the puck crosses the canvas plane and record the position at that time. Some shots bounce sideways off the ground or other pucks so never reach the canvas plane, here I do not wait until the pucks come to a standstill but record some (reasonable) position along the way.
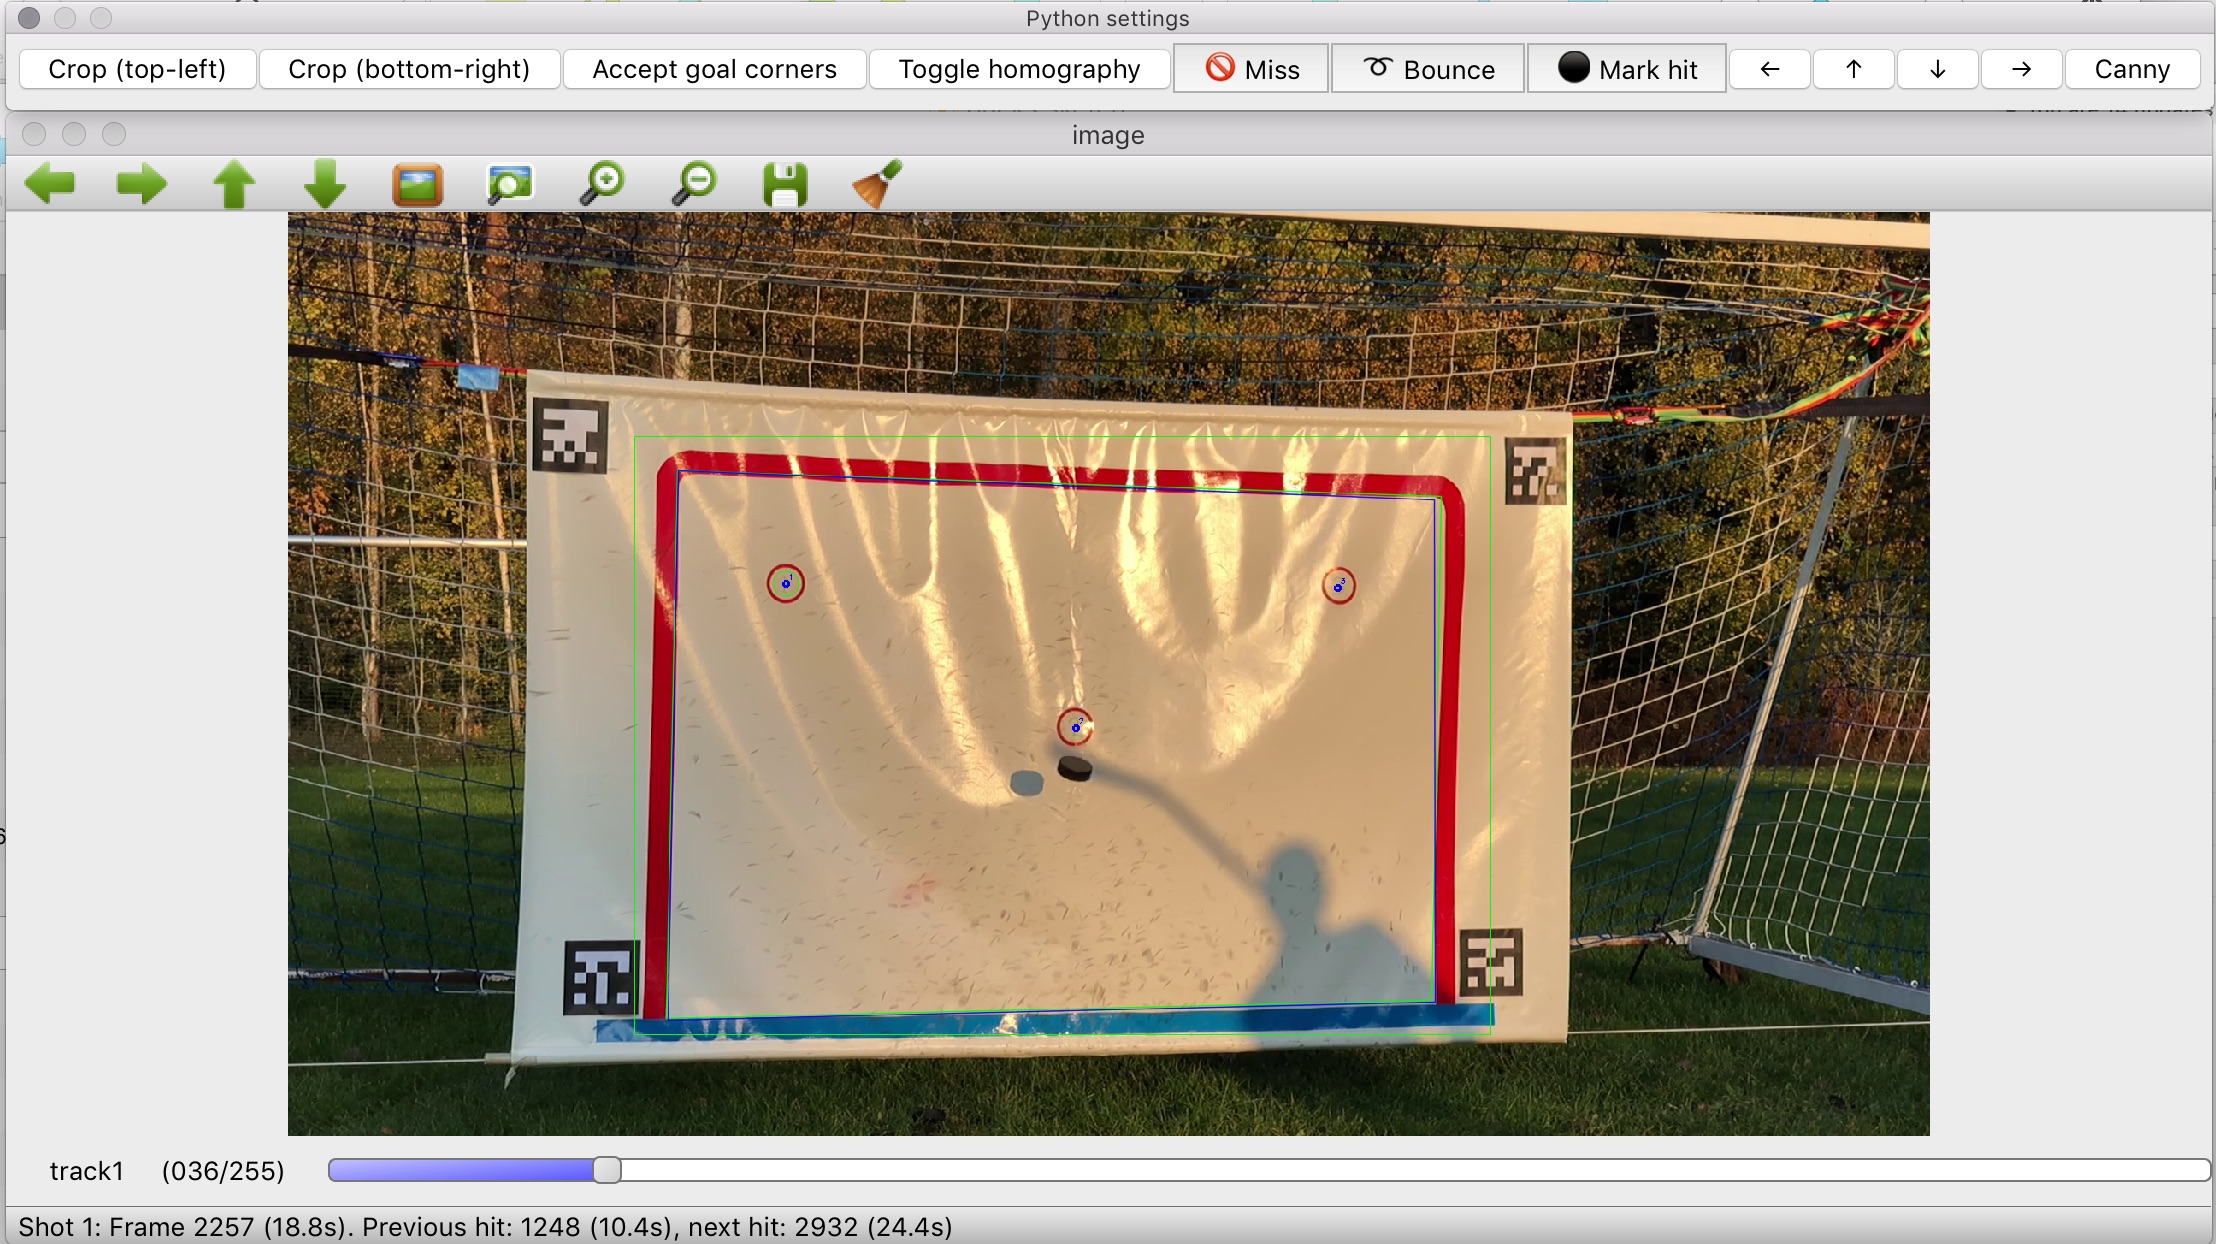
  2. The hit time/frame. On which video frame did the puck hit (or miss)? Initially I tried to always identify the very first frame where the puck touches the canvas. Lately, I err on the safe side as it can be very difficult to say for sure when there’s wind, shadows, light reflections, etc. at play. Also, see below.
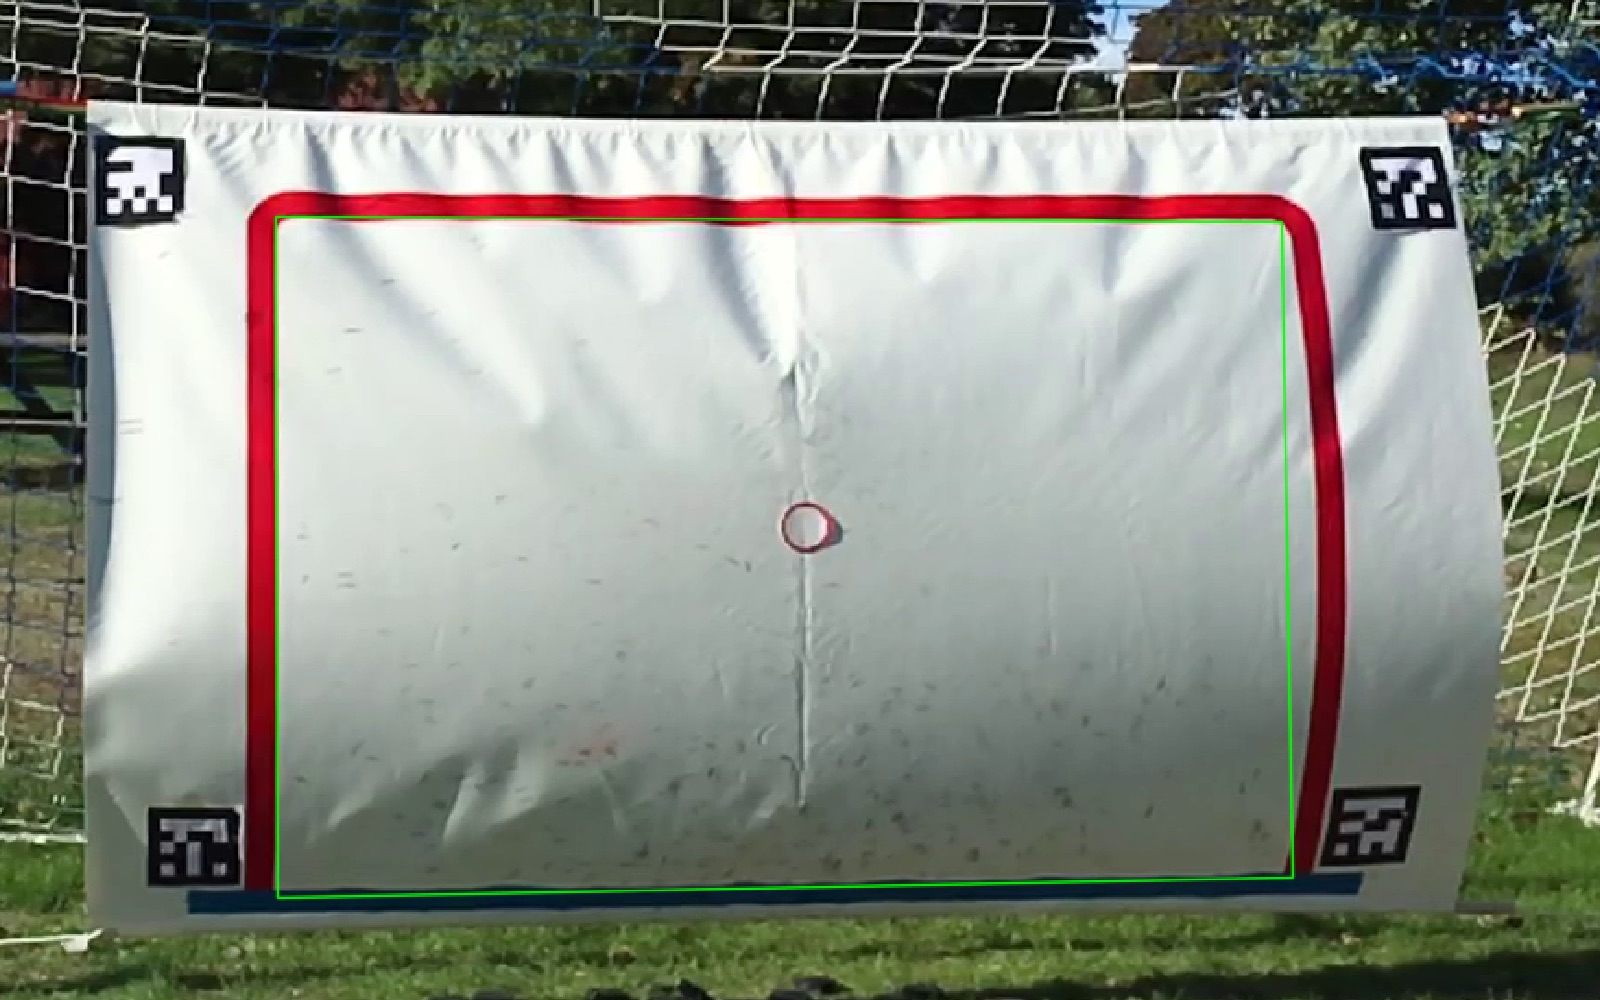
  3. Hit or miss. If a large enough area of the puck is within the goal frame, then I record it as a hit, otherwise a miss.
  4. Good reference or not. Is the recorded hit frame useful as training material for, say, a neural net? Perhaps the puck just barely touches the canvas so it provides a poor example, then I mark the hit frame as a questionable reference (so it could be used if I change my mind later) and mark the next frame as the proper reference. I also mark the preceding frames as reference “not hits”.
  5. Bounced first. If the puck seems to have bounced off the ground before I recorded its position, I mark it as having bounced. This because (a) the hit position should be taken with a grain of salt as the movement after bouncing can be erratic, (b) the power of the shot is often reduced which makes the hit a bad representative in terms of machine learning.
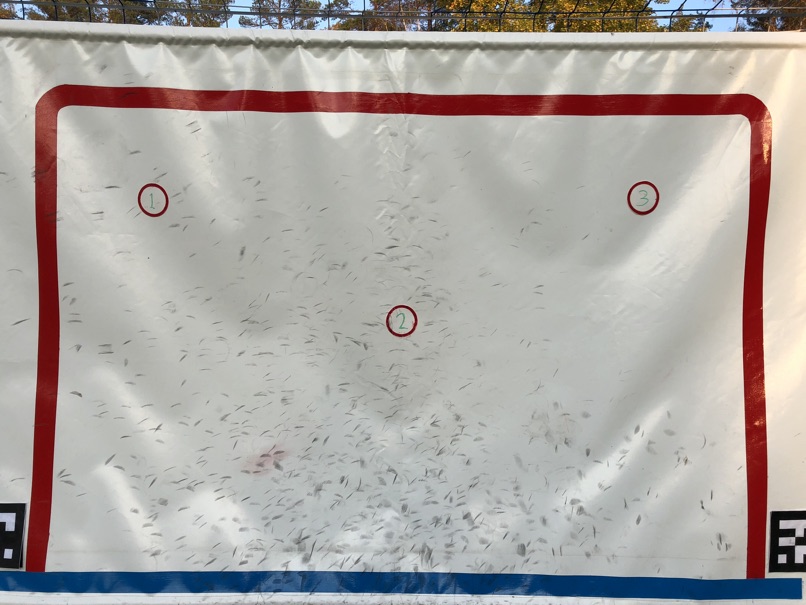
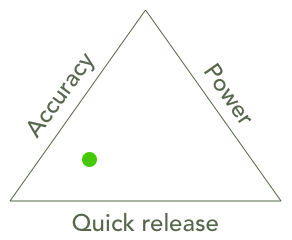
  6. Target. Which target was the player trying to hit? For practical reasons, I just use a repeating sequence like 1, 2, 3, 1, 2, 3 rather than a random sequence. This is not optimal for actual training but makes little difference here, at this stage.
Manually compiled results from a good round, hinting towards me getting better. Except last session, with three targets, I have only been aiming at the middle target (number 2). Personal illustration by author, October 2018.

Over time, while analyzing the videos and seeing all the different edge cases, I have realized that some of the recorded information is captured for multiple purposes, not necessarily sharing the same goals. That is, the material needed for training could be slightly different from the material needed for validation and testing.

Also, it is so easy to lose track of the end goal and make suboptimal choices: identifying the hit frames is just a proxy for determining the hit positions! Sure, here we might need references for when a puck hits to test against but in the long run, the only thing that matters is being able to accurately find hit positions.

It is likely that I need to go over the material again and reclassify as the assumptions I started with could be proven incorrect during the course of the project. The most fundamental such assumption is that all hits are to be included where I am more and more leaning towards that there must be a cutoff. If it comes down to a choice between accurately positioning all proper shots with risk of misclassifying all poor shots and, say, rough positioning of all shots including the poorest, then I think the prior makes the most sense.

Ninth session, indian summer

1 minute read

Personal photo by author, October 2018.

A little better results this time compared to last but more interestingly, I managed to get a complete session with the sun in the front of the canvas. I learned that (a) the canvas is glossier than I expected so the sun causes bright highlights on the canvas, and (b) the player can cast a shadow on the canvas. I had imagined having to deal with shadows but not the player’s own.

Note glossy highlights as well as simultaneous player, stick and puck shadows on canvas. Personal photo by author, October 2018.

I also realized that the mobile I’m using for recording the canvas has dual lenses. The 2x zoom setting makes for both less perspective distortion and much better input data as the canvas now covers a larger part of the recorded image. Of course, this will have to be scaled down during image analysis but having better source data should be an advantage. The Apple models that have dual lenses are iPhone 7 Plus, iPhone 8 Plus, iPhone X, iPhone XS and iPhone XS Plus so it is reasonable to use in testing (I probably should have only used this setting and then applied the results on a lower resolution video to see if the results were still applicable.)

1x (left) vs 2x (right) lenses on iPhone X compared in terms of resulting canvas size with approximately the same tripod distance. Personal illustration by author, October 2018.

Additionally, I introduced three targets even though I have not reached the level of ability where it is needed (or even helpful). Spinning a positive angle, it makes practice more challenging and fun as well as helps the puck spread out over the whole canvas.

Two additional targets added. The targets are fastened by tape and can be moved easily. The numbers are written with erasable whiteboard marker. Note the number of puck marks on the canvas, hopefully this does not interfer with image analysis. The marks do not come off easily but I am trying to find solutions by reading hockey forums as puck marks is a problem for both players and people trying to keep ice rinks clean. Personal photo by author, October 2018.

The trade-off between accuracy, power and quick release

1 minute read

Ideally, a player has an accurate, powerful shot always available without any time to set it up. In reality, hockey shots seems to be a trade-off between three qualities [1]:

Personal illustration by author, October 2018.
  • Accuracy is obviously important given the relatively small goal and the incredibly skilled goalkeepers of today leaving only tiny gaps open at any given time.
  • Powerful/fast shots are also important as, for example, it could make the puck reach a gap before the goalie has the time to move and block it. Secondly, a powerful shot increases the chance of the puck being left playable in the goal mouth area instead of being caught by the goalie.
  • Quick release is perhaps most important as it means being able to shoot before the goalkeeper has had a chance to react and reposition.

A skilled player is one that can make the trade-off decisions in real time during matches. In this way, measuring accuracy alone could mean inadvertently teaching players to carefully set up weak shots. The question of how to practice all the aspects simultaneously rather than the individual qualities separately is one I will be returning to later.

References

[1] Scott McMillan Shooting With A Purpose In Ice Hockey, Bachelor’s Thesis, 2012.

Eight session. The one where I forget how to position myself when shooting

2 minute read

Finally a day without strong wind. Last time’s success led me to enthusiastically drive to the football field for what I thought would result in a lot of quality data.

Setting up in the goal on the other side of the field. Personal photo by author, October 2018.

When I arrived, the sun was shining and in order to get it in front of the canvas, I set up everything in a different goal than usual. I also set up the camera on the right side according to a previous post, immediately realizing that it was much more in the way there if shooting left-handed.

After a few initial practice shots, I felt this is going well and started the cameras. At which point I forgot everything technique wise, resulting in a quite frustrating session where I had a lot of trouble getting the pucks off the ground.

After a lot of unsuccessful attempts, I realized that I had positioned myself too far forward compared to the puck and and when that wasn’t working, I tried to correct it by moving even more forward. After just two weeks of not being able to practice on account of weather, I had forgotten how to shoot and did not really find my way back.

Waiting for the rain to pass. Personal photo by author, October 2018.

That it started to rain did not help either. Surprisingly, the water underneath the pucks, together with the very slick surface on the ice-like board, formed a vacuum (I assume) and made the pucks stick. I tried switching to the other, dry, side of the ice when it stopped raining but that surface, never having been used, had so little friction that the pucks slid off the board before taking off in the air. Again, I really should have bought a bigger board as that would likely have been more forgiving in terms of lack of technique.

On the upside, I managed to get a shot or two with the sun shining directly at the canvas, creating a lot of shine. The intense brightness could definitely cause problems for the camera.

A number of thoughts going forward:

  • I will likely have to accept the camera always being positioned on the opposite side of the player (or it will have to be placed more at an angle, with other forms of error as a result).
  • I will continue using autofocus and autoexposure and deal with the problem of a frame potentially having very different characteristics than the frame before.
  • Due to me often shooting without much force and with little precision, the project problem is likely made much more difficult than need be. One idea is to reclassify all hits as not only hit/miss but hit/weak/miss, where weak would be most shots that have bounced on the grass before hitting the canvas. These shots are not representative of the hits I want to find as their hit positions provide little value as training data since the pucks bounce so randomly. The number of bounces per round, etc. may be useful to track though.
  • I used some stabilizing plastic pipes on the top part of the canvas this time and I think that was useful for avoiding the canvas sliding toward the middle, introducing waves/wrinkles.

Canvas has a non-planar homography in windy conditions

less than 1 minute read

In windy conditions, the canvas becomes a curved surface rather than a plane and it becomes impossible to find other than a rough approximation of the homography.

The top image shows the canvas with wind from behind, causing the canvas to take on a curved, non-planar shape. Only a rough approximation of the planar homography can be found in this case. The bottom image shows the canvas when the wind has subdued temporarily, here the found homography more closely matches the shape of the goal region. Personal photos by author. September 2018.

Since a mapping between the coordinate space of the canvas in the picture and a rectangular and planar representation of the canvas (i.e. without perspective) relies on finding a good homography, windy conditions provide quite the challenge. Finding non-planar mappings is not impossible but seems much less reliable.